
This recipe is posted as a courtesy to those following a variety of low-carb and ketogenic diets (not necessarily Meal Plans designed by me). This recipe may or may not be appropriate for you.
INTRODUCTION: Years ago, I used to make my own homemade yogurt using the pilot light in my gas oven to incubate it, but that was a long time ago. Unfortunately, my last few homes had electric stoves and not gas and purchasing yogurt just seemed more ‘practical’. Recently I switched from cow’s milk to goat’s milk to avoid A1 beta-casein that was negatively impacting my joints (you can read about A1 beta casein here), so I recently decided to start making my own Greek goat yogurt. My first reason to make my own was because the goat yogurt available on the market did not have the classic thick texture of “real” Greek yogurt, and the second reason was that making my own — even with premium milk such as goat milk or A2 beta-casein milk from heirloom cows still costs half of what it does in the store. Finally, making it myself, I can control what’s in it. Mine has no skim milk powder or gelatin; it’s just full-fat milk and yogurt culture.
Oven Method
The first time I made yogurt recently, I incubated it in my electric oven by preheating it to 200° F (93°C), turning the heat off and allowing it to cool to 110° F (43° C). Then I turned the oven light bulb on to maintain the ambient temperature, and since ovens are so well insulated, it worked as well as it used to in my old gas oven years ago.
Crock-pot® and Inkbird® Method
When I posted my first results, someone online suggested I used an old Crock-pot® to incubate it, but when I had investigated that idea previously, the lowest setting on mine was too hot for the purpose. The “Lo” setting ranged between 140-145°F (60-63°C) which would kill the bacterial culture, so that’s why I used my old oven method.
This person suggested I purchase an Inkbird® plug and play temperature controller that could be set up between the Crock-pot® and the power supply, in order to maintain the temperature at a steady 110° F (43°C) for the duration of the incubation time. That sounded terrific so I ordered one online.
The cool thing is the Inkbird® temperature controller can also be used to turn the same old Crock-pot® into sous-vide; which I will definitely try at some point, too!
Below are step-by-step instructions for making both regular and Greek yogurt.

Homemade Yogurt – Crock-Pot® and Inkbird® controller method
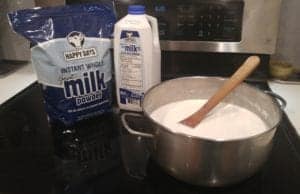
- Pour 3 liters of fresh goat milk (or other mammal milk) into a heavy bottom pot.
- Heat the milk at a medium-low heat until the milk reaches 180° F (82 ° C), stirring occasionally. It takes a while, but don’t rush it by turning it up or it will scald on the bottom of the pot, losing some of the valuable thickening protein. Once it reaches temperature, turn the heat down just enough to maintain the temperature stable for 20 minutes.*
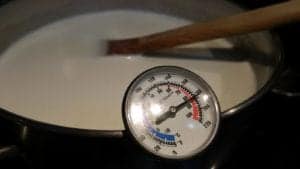
* Heating the milk is essential even if the milk is pasteurized, as it transforms the proteins. Holding the milk at 180° F (82°C) for 20 minutes makes the difference between runny and full-bodied yogurt (even if you don’t strain it to make it Greek-style). - Pour the hot milk into the removable ceramic insert of the Crock-pot®, then cover it and let it cool until it reaches 110-115° F (43°- 46°C) . Since this can take several hours, I use a cold water bath to speed things up if I want to get it incubating sooner and stir it with a sterilized stainless steel whisk as it sits in the cold water, to make sure it cools uniformly so the thermometer reading is accurate.
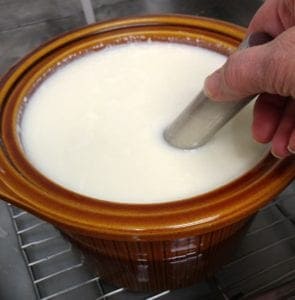
- Once the milk has cooled to just above 110°F (43°C), remove 1 cup of it (250 ml) to a bowl and add 1/2 cup (125 ml) of the starter you are using. I use a previous batch of my own yogurt, but start the first batch with some fresh commercial goat yogurt. Remember that each type of milk needs a different type of starter so be sure to buy one that is made from the same type of milk as you’re using. Stir the starter and cup of warmed milk back into the Crock-pot® and stir gently to distribute it evenly.
- Put the insert into the base of the Crock-pot® and insert the plug of the Crock-pot® into the power receptacle of the Inkbird® thermometer controller, then plug the controller into the wall.
- Set the temperature on the controller to 110° F (43°C) for 12 hours and then have it go off.
- Insert the probe into the warm milk that has the starter added.

- After 12 hours, remove the probe and unplug the Inkbird®.
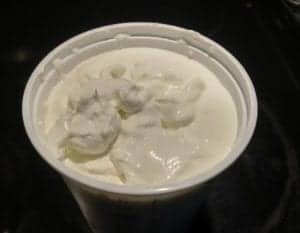
At this point, you have plain yogurt which can be packaged up into containers and cooled in the refrigerator for 12 hours before eating.
For Greek Yogurt
- Line a stainless steel colander or strainer with a clean piece of white cotton cloth and attach it firmly to the edges with clips.
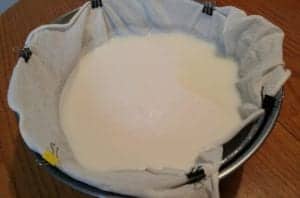
- Insert the strainer or colander into a large bowl that will catch the large amount of whey that will drain off. Keep in mind, about 35-40% of the finished yogurt is whey, which is what is being removed by draining.
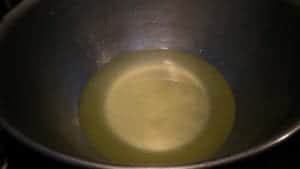
amount of whey after 1 hour of draining - Pour in yogurt and while it is draining, cover the strainer.

- Let the whey drain out in the fridge or in an oven that has been warmed and cooled to 110°F (43°C) and has the light bulb on. Remember, that while straining, the yogurt needs to be either in the fridge or at the same temperature it incubates at, to keep it out of the temperature “danger zone”.
Mine goes into a warmed, cooled oven because my fridge always has too much food in it to accommodate a large bowl! - Drain the yogurt until the mixture is the thickness you like. I drain mine for 12 hours so that it is very thick.
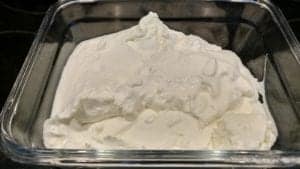
- Package it up into sterilized containers with covers and let it chill 12 hours in the fridge before eating.
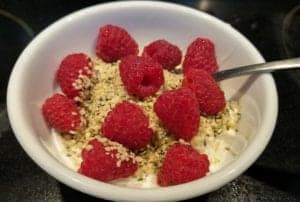
Enjoy as is, or with a sprinkle of hemp hearts and berries.
Macros – 3/4 cup / 175 ml of plain Greek Goat Yogurt
Carbohydrates: ~6 g
Protein: ~15 g
Fat: ~10 g
You can follow me on:
Twitter: https://twitter.com/lchfRD
Facebook: https://www.facebook.com/lchf-rd/
Instagram: https://www.instagram.com/lchf_rd
Fipboard: http://flip.it/ynX-aq
Copyright ©2019 The Low Carb Healthy Fat Dietitian (a division of BetterByDesign Nutrition Ltd.)
LEGAL NOTICE: The contents of this blog, including text, images and cited statistics as well as all other material contained here (the ”content”) are for information purposes only. The content is not intended to be a substitute for professional advice, medical diagnosis and/or treatment and is not suitable for self-administration without the knowledge of your physician and regular monitoring by your physician. Do not disregard medical advice and always consult your physician with any questions you may have regarding a medical condition or before implementing anything you have read or heard in our content.
Share to Flipboard:
